Gardening isn’t just about sticking seeds in the ground and hoping for the best—layout plays a huge role in how productive, beautiful and enjoyable your vegetable patch will be. A well‑planned design maximizes space and ensures healthy growth.
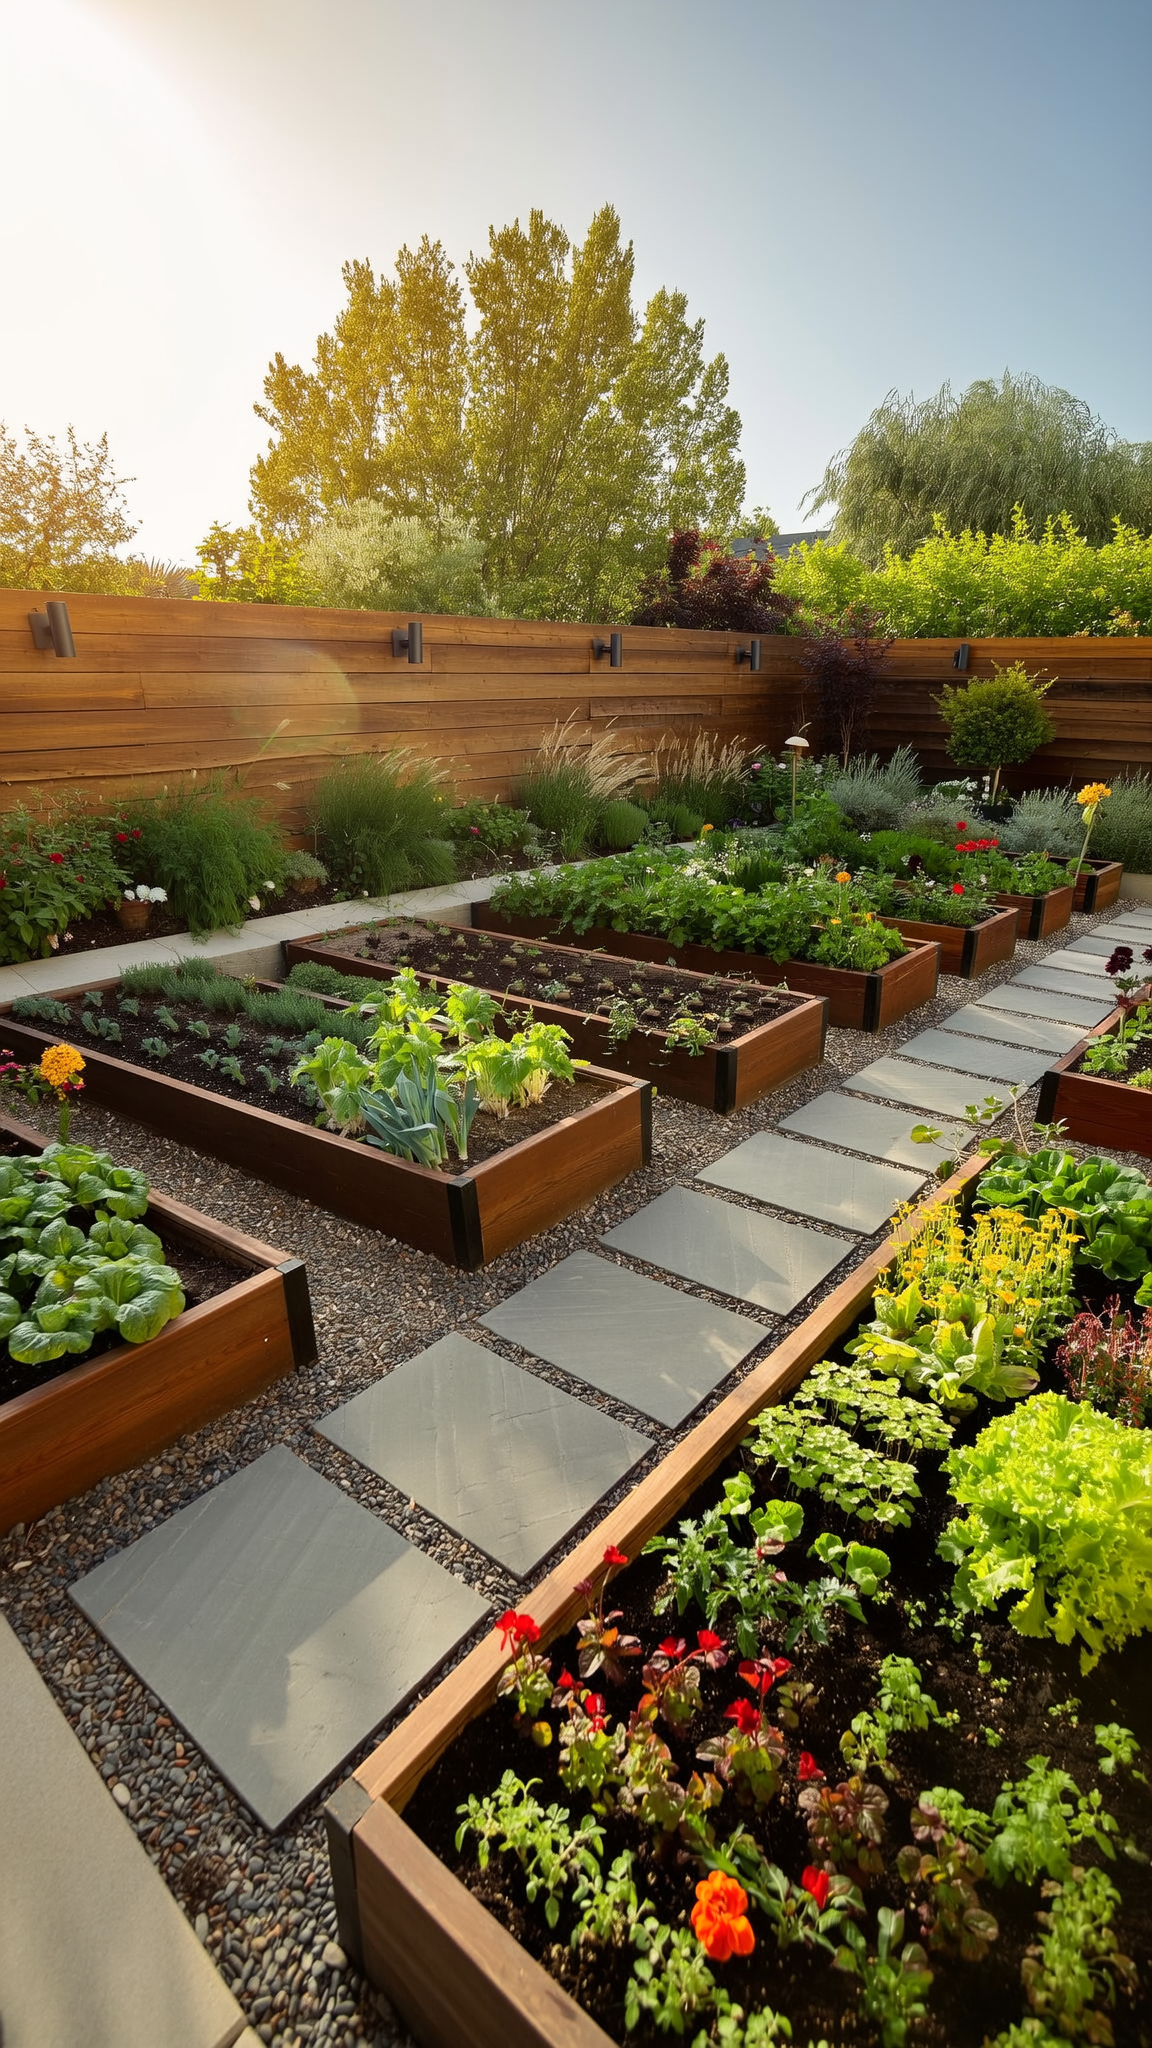
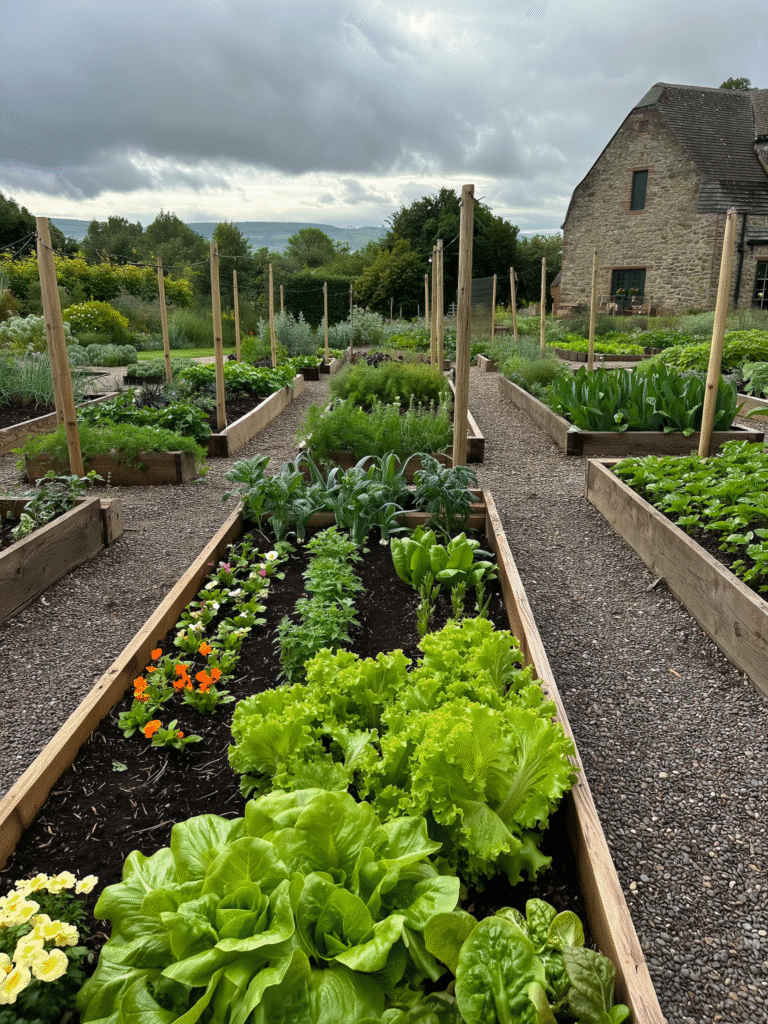
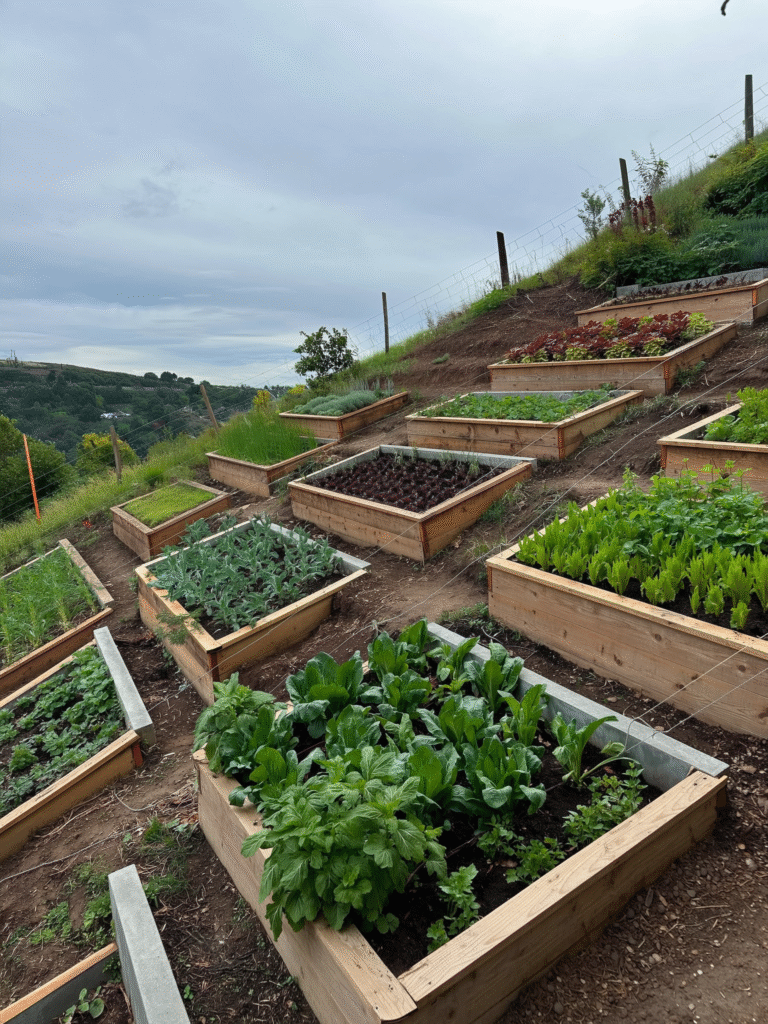
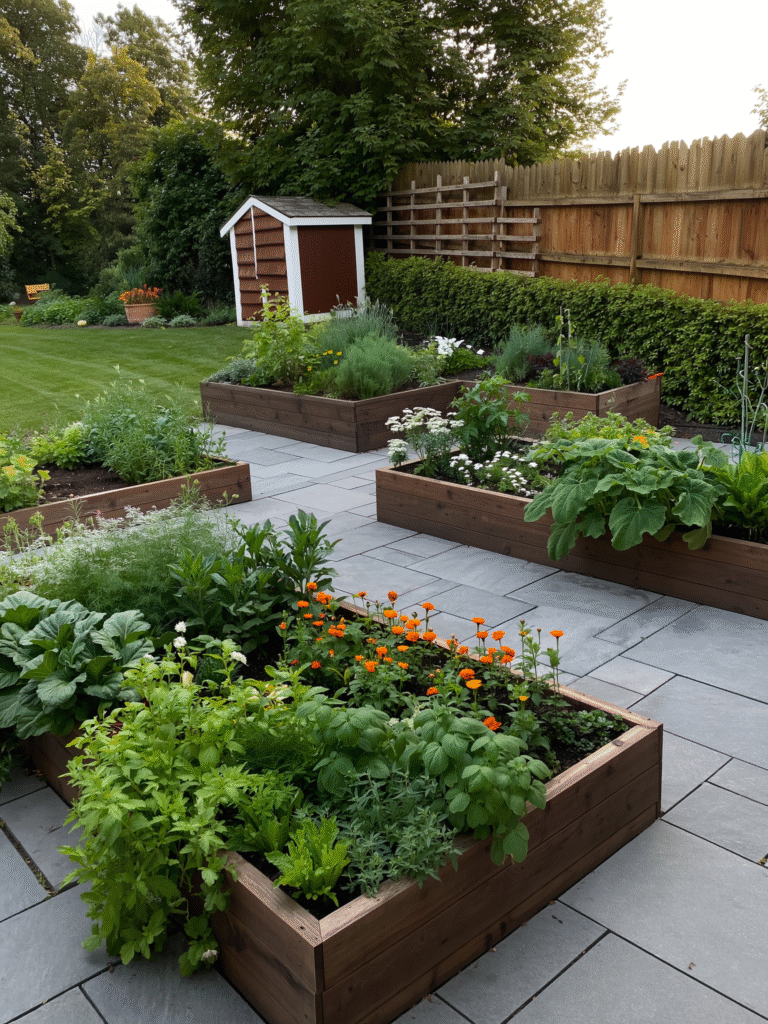
1. Raised Bed Layout

Raised beds are essentially freestanding boxes of soil built above ground level. They improve drainage, warm up quickly in spring and make it easier to control soil quality. Beds should be narrow enough—about 90–120 cm (3–4 ft) wide—to reach the centre without stepping on the soil. Paths between beds need to be wide enough for a wheelbarrow (60–90 cm/2–3 ft). Orient beds north–south so plants receive even sunlight.
Advantages
- Great for clay soil or areas with poor drainage. Because the soil is elevated, excess water drains away and compaction is minimized.
- Easier on the back; you can experiment with different bed heights to accommodate mobility issues.
- Warms up earlier in the season, allowing an extended growing period.
Considerations
- Building materials cost more than simply digging in‑ground beds.
- Beds dry out faster; regular watering or drip irrigation is essential.
Good plants for raised beds: salad greens, carrots, radishes, onions, strawberries and herbs. Avoid tall crops like corn or large sprawling squash unless beds are very wide.
2. Grid (Square‑Foot) Layout

In the grid system, a bed is divided into 30 cm (1 ft) squares using string, sticks or wooden slats. Each square is planted densely with one type of crop—one tomato per square, four lettuces or nine bush beans, for instance. This approach is excellent for beginners because it provides a clear planting plan and uses space efficiently.
Advantages
- Efficient use of small spaces; great for balconies or compact gardens.
- Keeps track of plant varieties; you can easily see what’s growing where.
- Easy to maintain: weeds are suppressed by dense planting.
Tips
- Amend the soil well with compost—intensive planting draws a lot of nutrients.
- Label each square with plant names to simplify harvesting and crop rotation.
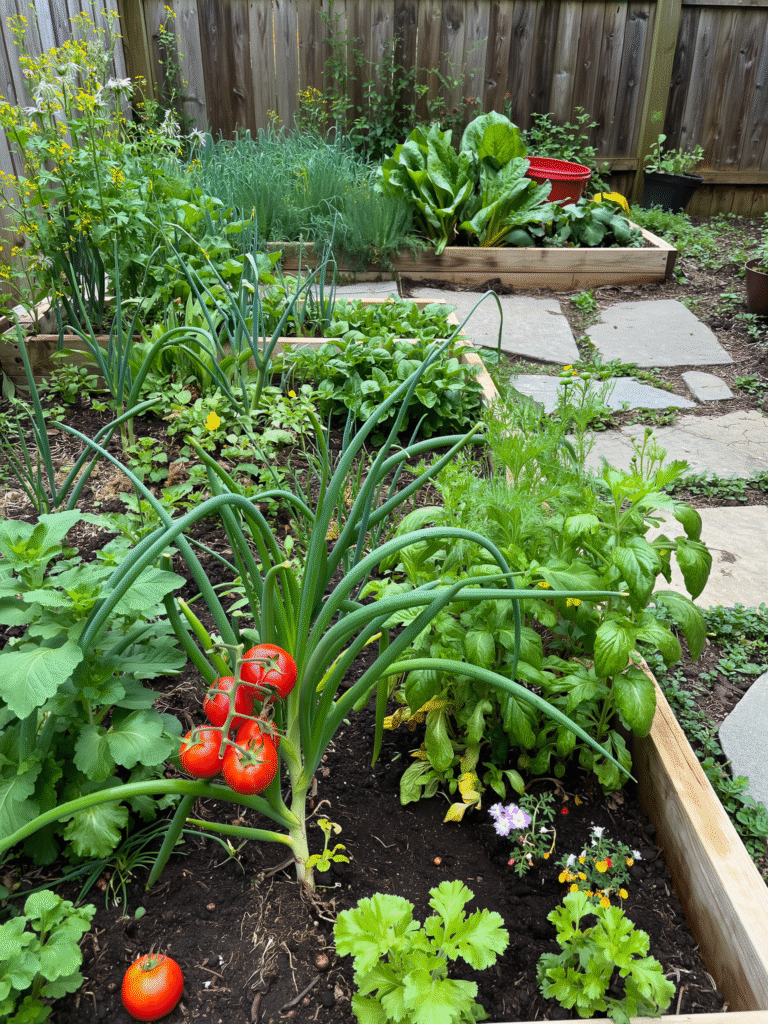
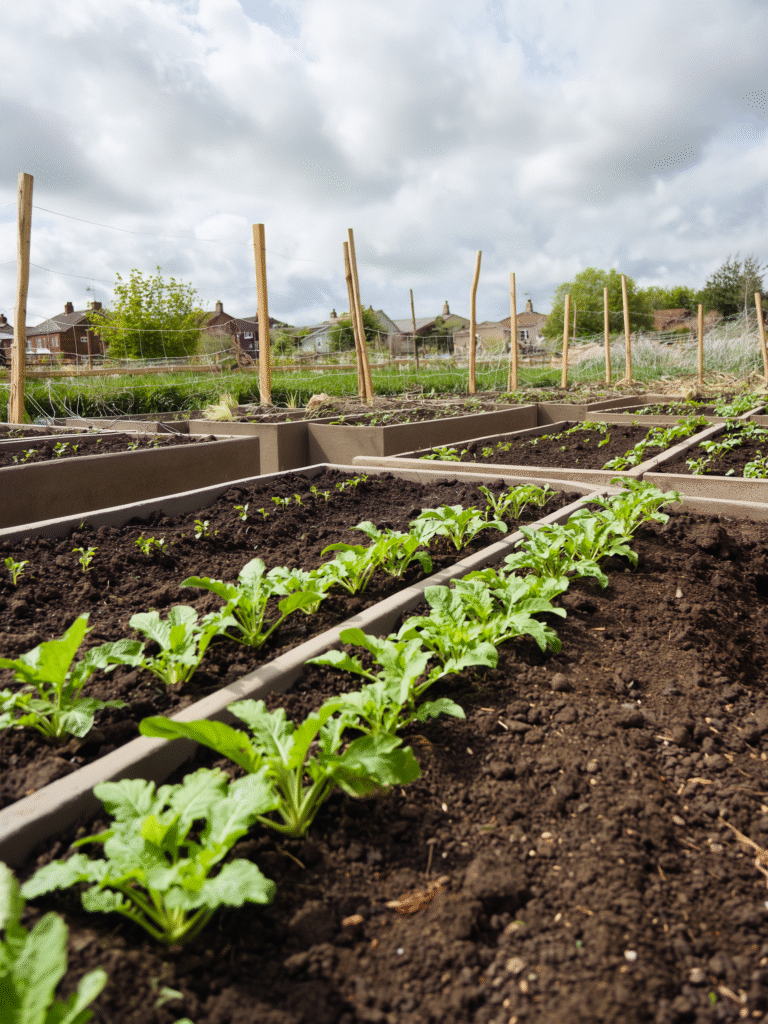
3. Traditional Row Layout

Classic row planting involves arranging crops in long lines with paths between them. It’s straightforward and works well in large plots. Row widths and spacing depend on crop type; leafy greens may be planted 30 cm apart, whereas sprawling squash may require 1 m or more.
Advantages
- Easy access for hoes, wheelbarrows and irrigation systems.
- Ideal for mechanized or large‑scale gardens.
- Provides clear delineation for succession planting and intercropping.
Tips
- Position tall plants (corn, trellised tomatoes) on the north or east side so they don’t shade shorter crops.
- Mulch paths with straw or wood chips to reduce weeds and erosion.
4. Keyhole Garden Layout
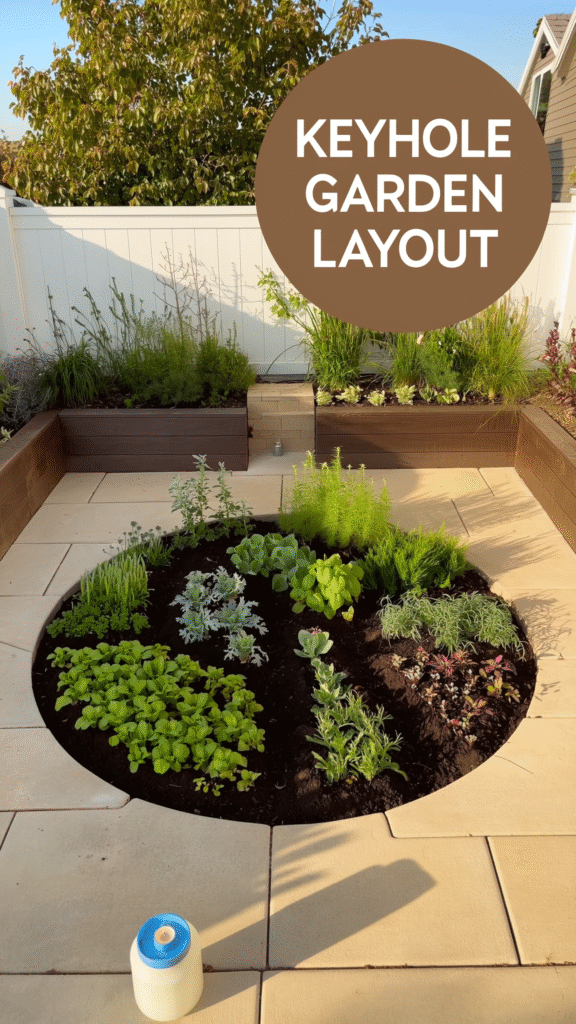
A keyhole garden is a circular raised bed with a pie‑slice cut‑out path leading to the centre, where a compost basket sits. Organic kitchen scraps and water are added to the basket, providing nutrients that radiate outwards. This layout is ideal for small urban yards and arid climates because it’s water‑efficient.
Advantages
- Extremely water‑efficient and self‑fertilizing: the central compost basket feeds plants and retains moisture.
- Allows easy access to all parts of the garden without stepping on the soil.
- Supports sustainable gardening practices.
Tips
- Use drought‑tolerant vegetables like peppers, eggplant and herbs around the outer circle; plant moisture‑loving crops like lettuce closer to the compost column.
- Build the bed with stones or bricks to hold heat and moisture.
5. Vertical Garden Layout
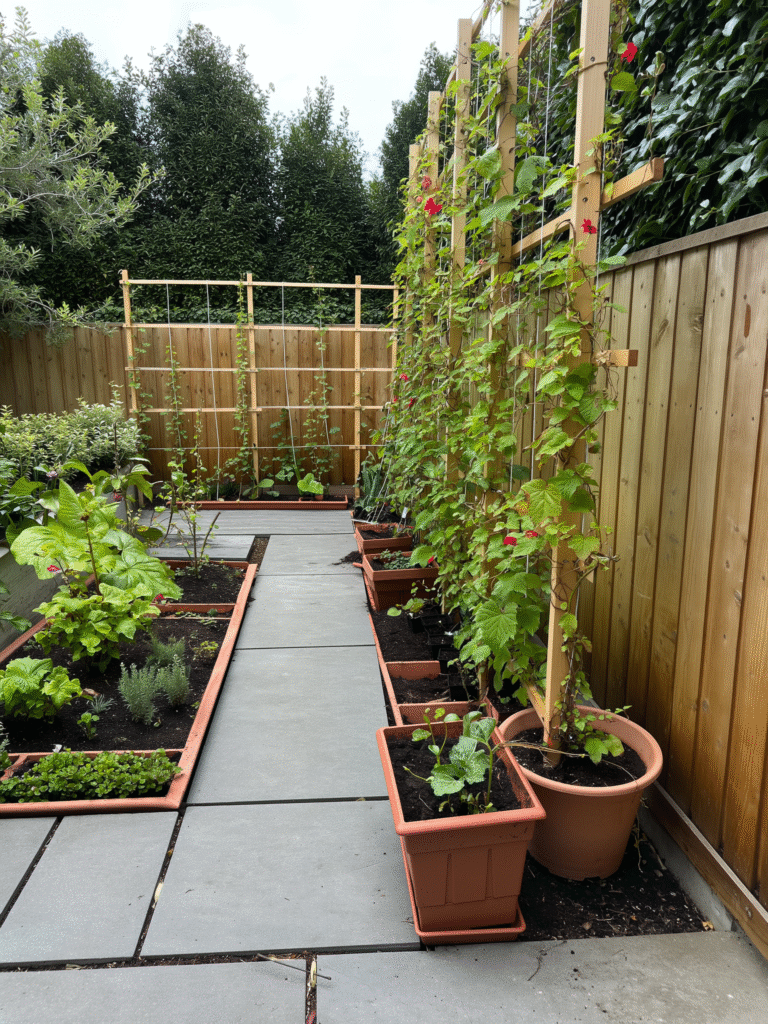
Vertical gardening uses walls, trellises, arbors and stacked planters to grow plants upward instead of outward. This method is essential for urban gardeners with limited ground space.
Advantages
- Maximizes production per square metre; climbing plants like beans, peas and cucumbers thrive when supported.
- Frees up ground space for low‑growing crops or seating.
- Improves air circulation and reduces disease pressure.
Tips
- Choose sturdy trellises and secure them firmly; heavy vines need strong support.
- Pair vertical structures with a drip irrigation line to ensure even watering.
6. Companion Planting Layout
Companion planting groups crops that benefit each other’s growth. Classic pairs include tomatoes with basil, carrots with onions and cabbage with dill. This method supports natural pest control and improves yields.
Advantages
- Encourages symbiotic relationships and enhances flavour in certain crops.
- Naturally deters pests (e.g., marigolds repel nematodes and whiteflies).
- Provides more biodiversity in a small area.
Tips
- Avoid pairing plants that compete for nutrients (e.g., onions and beans). Use a companion planting chart to plan combinations.
- Incorporate aromatic herbs (basil, thyme) at the ends of beds to attract pollinators and repel pests.
7. Mandala Garden Layout
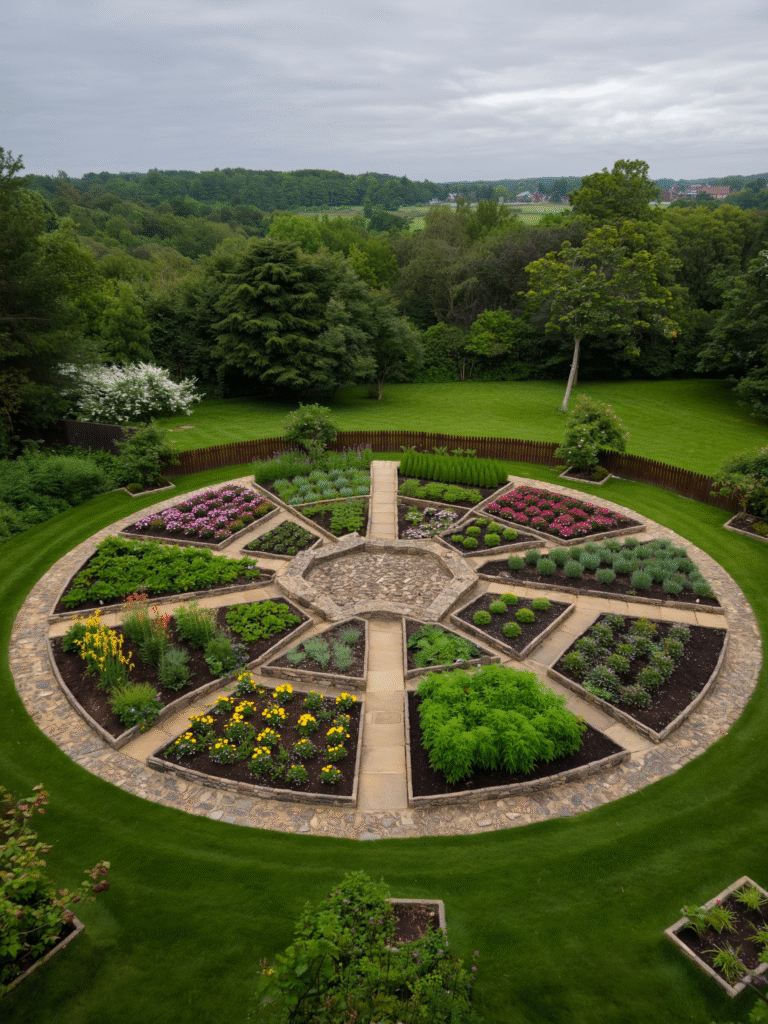
The mandala garden uses concentric circles with radiating paths to create a symmetrical, meditative space. Raised beds or ground‑level beds form segments where different crops are planted. This design is visually striking and often employed in permaculture gardens.
Advantages
- Allows easy access to every bed from a central point.
- Encourages creativity and mindfulness while gardening.
- Great for growing a variety of plants in separate microclimates (the centre receives more shade).
Tips
- Use curved, mulched paths about 45–60 cm wide for comfortable access.
- Plant taller crops on the outer ring and shade‑tolerant herbs closer to the centre.
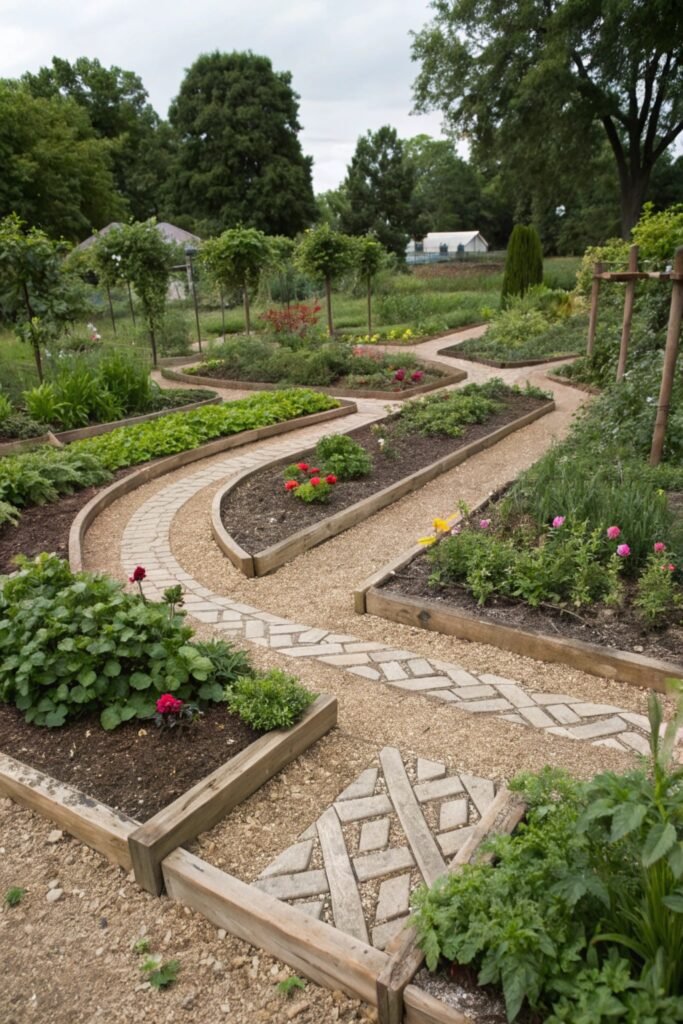
8. Potager (Ornamental Kitchen) Garden
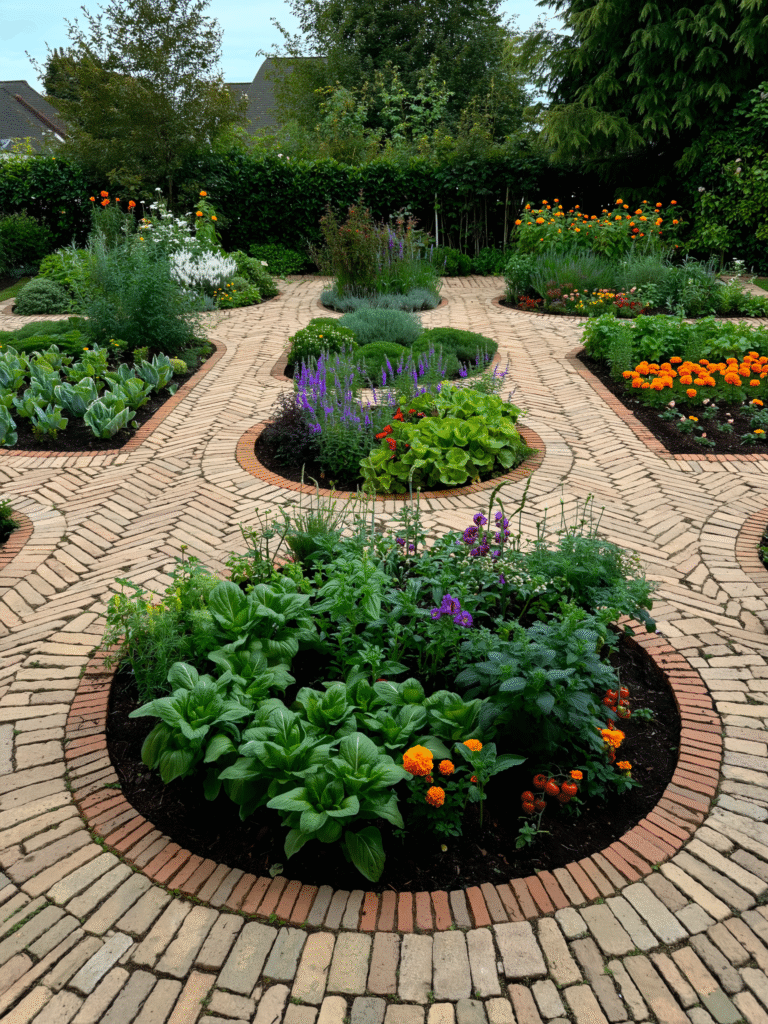
The potager combines vegetables, herbs and flowers in an ornamental design. Inspired by French kitchen gardens, it’s both productive and beautiful, often arranged in geometric patterns and edged with low box hedges or brick paths.
Advantages
- Enhances biodiversity and attracts pollinators.
- Provides edible produce alongside ornamental beauty.
- Encourages succession planting because empty spaces can be quickly filled with flowers or herbs.
Tips
- Use repeating shapes (circles, squares) and symmetry for a cohesive look.
- Pair colourful edible plants—purple kale, rainbow chard and nasturtiums—to heighten visual interest.
9. Raised Rows Layout
Raised rows are created by mounding soil into long, narrow beds with furrows between. Unlike wooden boxes, these rows are formed directly from your native soil. They improve drainage and are easy to build.
Advantages
- Simple and inexpensive to set up—no lumber required.
- Mounded soil warms faster in spring and drains excess water effectively.
- Rows can be reshaped or moved from year to year.
Tips
- Incorporate plenty of organic matter into the mounds to retain moisture.
- Mulch the furrows to suppress weeds and reduce erosion.
10. Container Garden Layout
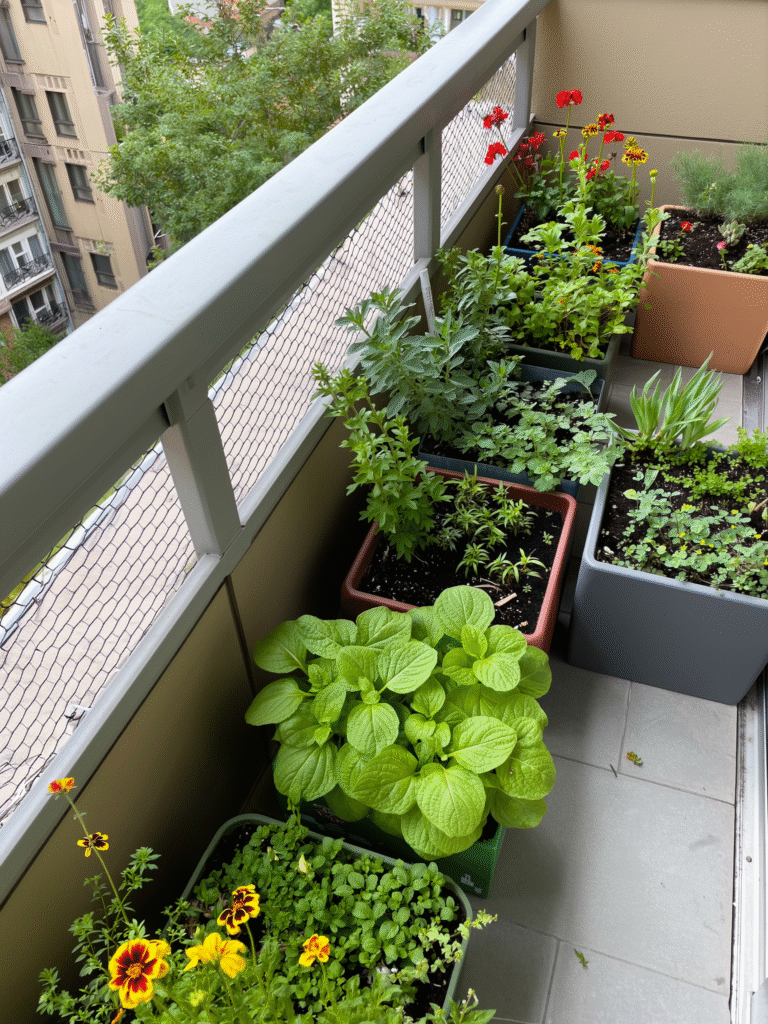
Container gardening uses pots, grow bags, buckets and vertical planters to cultivate vegetables on patios, balconies or rooftops. Containers allow gardeners to control soil quality and move plants to follow the sun.
Advantages
- Perfect for renters or those with limited space—grow anywhere from balconies to driveways.
- Reduces soil‑borne diseases and pests.
- Easier to manage soil fertility and drainage.
Tips
- Choose lightweight containers with drainage holes; heavy pots are harder to move.
- Use a high‑quality potting mix and feed regularly with organic fertilizer.
- Consider self‑watering containers to maintain consistent moisture.
11. Four‑Square Layout

The four‑square design divides the garden into four equal beds separated by paths. Each quadrant is dedicated to a different plant family—leafy greens, roots, fruiting crops and legumes—which makes crop rotation simple.
Advantages
- Simplifies crop rotation and prevents soil nutrient depletion.
- Creates clear organization and easy access to each bed.
- Allows you to tailor soil amendments for different crop types.
Tips
- Rotate each plant family clockwise each year to minimize pest and disease buildup.
- Install a central water source (such as a drip manifold) at the intersection of the paths.
12. In‑Ground Bed Layout
Planting directly into prepared soil remains one of the most versatile and affordable methods. Define beds with ropes or boards and leave paths in between. Double digging or broad‑forking loosens soil deeply, improving root growth.
Advantages
- Low cost; no need for lumber or raised structures.
- Flexible shapes and sizes—ideal for large gardens.
- Easily integrates cover crops and green manures.
Tips
- Amend soil with compost and aged manure annually to maintain fertility.
- Avoid stepping on the beds; place stepping stones or boards if necessary.
13. Spiral Garden Layout
The spiral garden uses a circular mound that winds upwards like a snail shell. The higher portion receives more sun and drainage, while lower sections stay moister.
Advantages
- Creates multiple microclimates in a small footprint.
- Ideal for herbs and small vegetables—plant Mediterranean herbs (rosemary, thyme) at the top and moisture‑loving plants (mint, chives) near the bottom.
- Adds sculptural interest to the garden.
Tips
- Build the spiral with stones, bricks or reclaimed materials for stability.
- Mulch the pathways between coils to suppress weeds and conserve moisture.
14. Mixed Border Layout
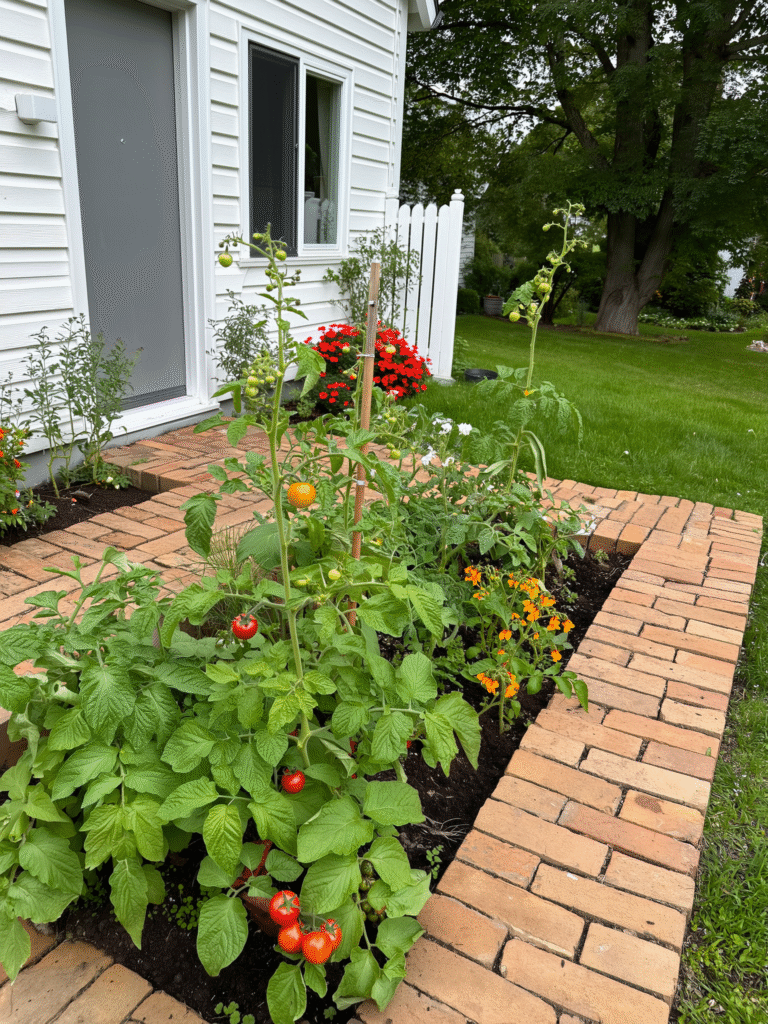
The mixed border incorporates edible plants along existing borders—around fences, paths or patios—alongside ornamental perennials. This design saves space and adds visual appeal.
Advantages
- Utilizes otherwise underused edges of the garden.
- Attracts pollinators and beneficial insects with flowers and herbs.
- Creates a multi‑layered, ornamental effect.
Tips
- Plant taller vegetables like okra or Jerusalem artichokes at the back, medium‑height crops (chard, kale) in the middle and low groundcovers (thyme, strawberries) at the front.
- Include perennial flowers such as echinacea and lavender to attract bees and provide year‑round structure.
15. Themed Garden Layout
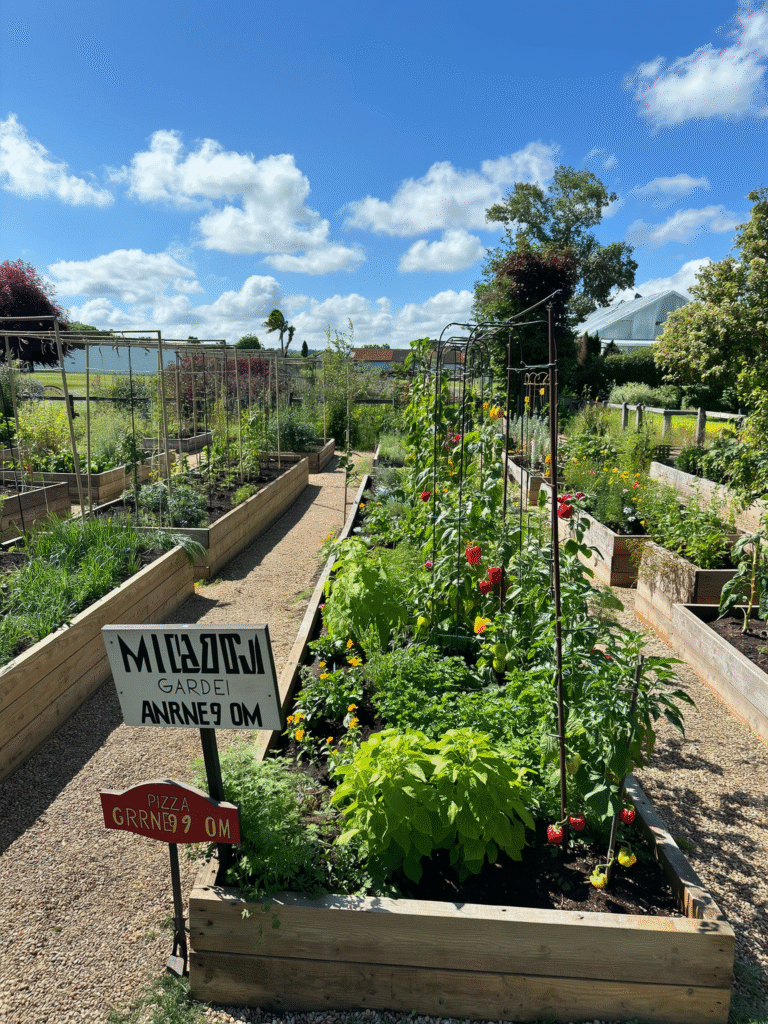
Designing around a theme adds fun and purpose to your garden. A pizza garden arranges tomatoes, peppers, basil and oregano in circular “slices,” while a salad garden groups lettuces, cucumbers and radishes.
Advantages
- Encourages children and beginners to engage in gardening.
- Helps focus crop selection; you grow exactly what you need for favorite dishes.
- Can be combined with decorative shapes and colours.
Tips
- Plan for sequential harvesting—plant quick‑growing salad greens between slower‑maturing tomatoes and peppers.
- Use signage or painted labels for each “slice” to add whimsy.
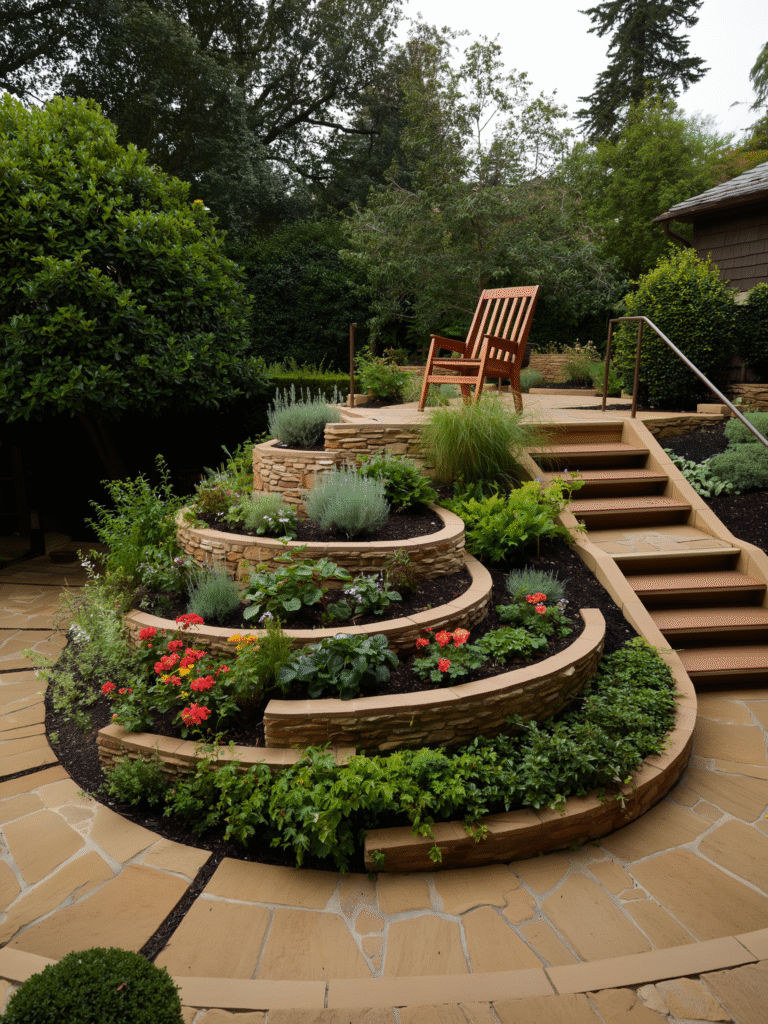
16. Tiered (Terraced) Layout
For sloped yards, terracing makes the land usable by creating flat planting areas. Retaining walls built from wood, stone or brick hold back soil. Terraced beds reduce erosion and improve water distribution.
Advantages
- Controls runoff and prevents soil erosion on slopes.
- Maximizes planting area on uneven terrain.
- Adds depth and visual interest to the landscape.
Tips
- Install sturdy retaining walls and consult a professional for steep slopes.
- Orient terraces along contour lines to slow water flow.
- Plant deep‑rooted perennials (comfrey, asparagus) on lower terraces to absorb nutrients.
17. U‑Shaped Garden Layout
The U‑shaped layout forms a horseshoe with three connected beds, leaving an open centre walkway. This ergonomic design allows you to reach plants from the inside and outside without stepping into the bed.
Advantages
- Highly ergonomic—no need to stretch or lean far to harvest.
- Efficient for intensive planting and succession cropping.
- Works well for raised beds or in‑ground beds with firm edging.
Tips
- Make the U at least 90 cm (3 ft) wide on each side, and leave a central aisle of 60 cm (2 ft) for comfortable access.
- Use trellises on the sides of the U to grow climbing plants without sacrificing walkway space.
18. Zigzag Path Layout
Adding zigzag paths introduces a playful, artistic element to the garden. The angled beds increase edge space—perfect for edible flowers and herbs—and improve access by shortening walking distances.
Advantages
- Provides unique visual interest and breaks up large rectangular plots.
- Creates microclimates along the angled edges.
- Helps manage water runoff and soil differences.
Tips
- Keep path widths consistent; irregular paths can become tripping hazards.
- Use the bends to plant focal points such as ornamental kale or sculptures.
19. Wildlife‑Friendly Layout
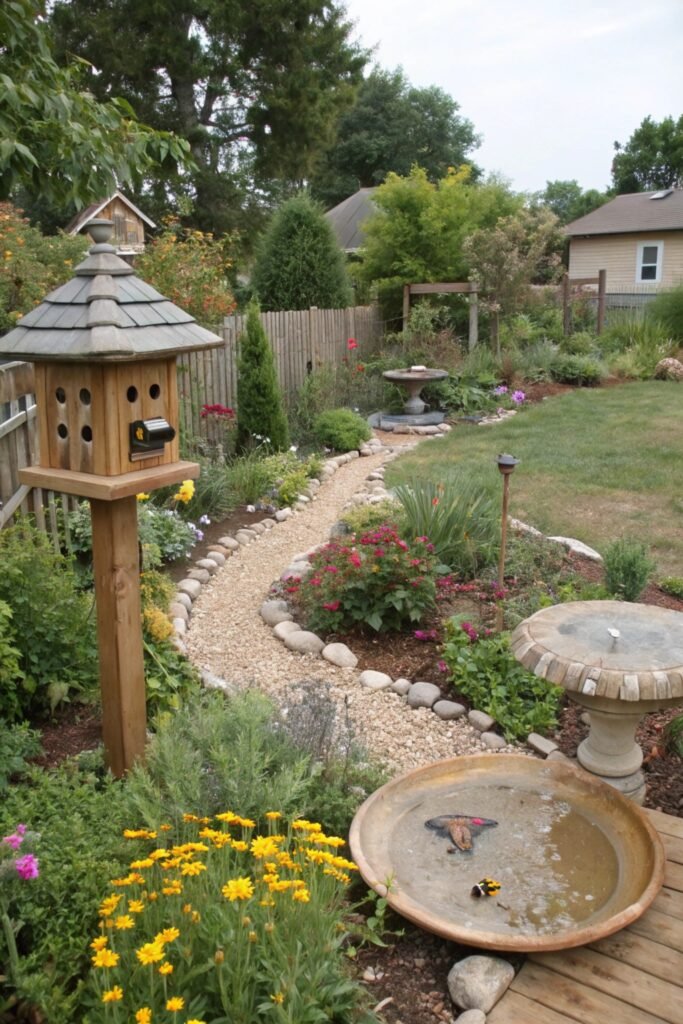
This design integrates habitat for beneficial wildlife—pollinator strips, bird feeders, native plants and shallow water dishes—into your vegetable plot. Supporting biodiversity helps control pests naturally and improves pollination.
Advantages
- Attracts helpful insects like ladybirds and lacewings.
- Supports local ecosystems and increases ecological resilience.
- Creates a more dynamic and educational garden.
Tips
- Plant a succession of nectar‑rich flowers (cosmos, zinnias, sunflowers) along garden edges.
- Provide a water source—shallow dishes with stones—for bees and butterflies.
- Avoid pesticides; use organic controls and encourage predatory insects.
20. Cluster Planting Layout

Cluster planting groups vegetables in irregular clusters rather than straight rows. Plants are selected based on similar water and nutrient needs and arranged to mimic natural plant communities.
Advantages
- Makes efficient use of irregularly shaped plots and small spaces.
- Encourages companion planting and a more natural look.
- Reduces weed pressure by shading soil.
Tips
- Sketch your plot on paper and group crops with similar growth habits together; for example, plant a cluster of leafy greens, root crops and a tall support plant like corn or sunflowers.
- Leave small paths between clusters (30–45 cm) to allow access for harvesting and maintenance.
Additional Design Tips and Considerations
(image prompt: a gardener sketching a planting plan on graph paper with seed packets and measuring tape nearby)
- Know your climate and sunlight. Observe how many hours of sun each part of your yard receives and choose crops accordingly. Leafy greens can handle partial shade, while fruiting vegetables need at least 6–8 hours of direct sun.
- Plan for irrigation. Install drip lines or soaker hoses before planting to avoid disturbing roots later. Group plants with similar water requirements together.
- Rotate crops annually. Rotating plant families helps break pest and disease cycles and balances soil nutrients.
- Keep a garden journal. Record planting dates, varieties and yields to refine your layout each year.
- Add extra touches. Vertical trellises, decorative arches and focal points such as benches or bird baths enhance the garden’s beauty and functionality.
Conclusion
Designing a vegetable garden is as much about creativity as it is about practicality. The twenty layouts above offer a range of solutions—from tidy raised beds to whimsical mandala patterns—for every space and gardener. By considering sunlight, soil quality, water access and your own aesthetic preferences, you can craft a productive and beautiful kitchen garden. Whether you build terraces on a slope, create a wildlife sanctuary or mix veggies with flowers, thoughtful planning will reward you with healthy crops and a space you love to spend time in. Use the image prompts as inspiration for your own designs, and let your garden evolve each season.